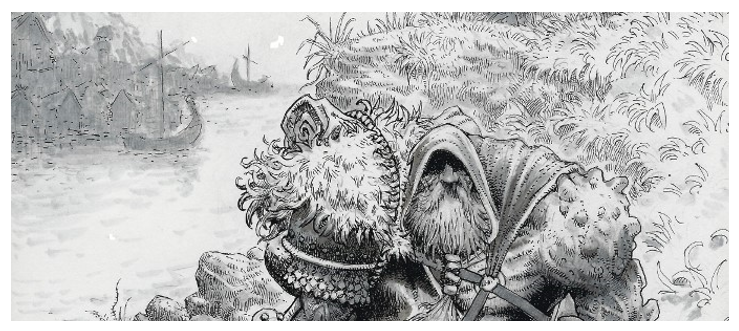

Asmorgar was an ancient Kingdom within the lands of the North. Two hundred years ago most of the land which is now Ostvick and Hraedir Warholds were united under the evil Necromaster of the Kingdom of Asmorgar.
The Necromaster was a foreign sorcerer who migrated into the lands of the North from the distant Empire, the Necrogarchy of Leng. Likely he was displaced during the Nightshade War which wrought wholesale death and destruction throughout the Kingdoms of the South.
The Necromaster had dozens of powerful servants, some embraced by the evil of his vile sorcery, some not. Most of these were buried in scattered barrows constructed by servants or slaves at locations close to where they fell, slain by the loyal warriors of the true Kings of the North.
The Kingdom of Asmorgar is no more but its crumbled ruins and isolated barrows still exist within the central Warholds of the North. More often than not these barrows still contain artifacts belonging to their occupants, be they deceased or otherwise. Many of the native folk dwelling in the North will avoid these places when they find them. Any treasures awaiting inside are widely thought to be cursed.

Important Referee Note: It should be pointed out that area 4 has been mostly blocked off from view by the wight which dwells in this barrow. At 4a a heavy stone slab weighing seventy pounds has been slid over to mostly block the very narrow, two foot wide entrance into room 4. Room 4 is where the Wight keeps watch on its barrow and treasures and it is where it has dragged and fed upon the few unfortunate individuals who have wandered into the place over the years. Consider room 4 a secret room and the slab covering its entrance a secret door. It should be pointed out ONLY if the player characters search area 3 for secret doors or are lucky enough to roll an automatic detection if they have a dwarf or elf in their party. The wight will remain hidden in area 4 and will wait until the party explores as far as area 6, 7 or 8 before it rolls aside the slab and moves to attack the party from the rear.
2. This is the entry tunnel into the barrow. It is roughly eight to ten feet wide and thirty feet long. The tunnel continues to slope down from the base of the stairs to where it enters area 3. At that point the slope flattens out and the remainder of the interior of the barrow is at the same depth, roughly fifteen feet below the surface of the slight mound above. The floor of the barrow is hard and flat, mostly crushed gravel and small pieces of debris. If a character declares that they are searching the floor and they are not specifically searching an urn, pot, bag or other object they have a one in ten chance of finding a loose piece of gold. Up to forty three loose and scattered pieces of gold can be recovered from the floor of the barrow if the characters decide to carefully search but it may take them hours and hours to uncover every piece. The air within the barrow is very cool, immediately ten degrees colder than whatever the temperature is outside.
3. The barrow opens slightly into a chamber to the left at this location and widens into a twenty foot wide tunnel curving to the South and extending forty feet before arriving at a crossing of passages. The roof of the barrow here is uneven and cracked by thick brown green roots belonging to the large tree which has grown into the top of the mound above. Harmless pill bugs about the size of a man's thumb, creeping earth worms and centipedes about the size of a little finger crawl and scuttle around within the roots and cracks of the stone overhead and throughout the barrow.
This location contains a dirt and dust coated large sack which is utterly rotted into nothing but a bare rag of its former self. A half dozen human skulls contained within the sack spill out onto the floor of the barrow. Next to the sack are three large clay pots about two feet tall and roughly ten inches in diameter. The tops of the pots are covered with a clay lid. Each pot is painted with semi abstract patterns of mounted warriors riding into battle, a common theme in objects coming from the age of the Kingdom of Asmorgar. One pot contains a tangled horde of old and mostly rusted out weapons, swords mostly and none of any real value. One pot contains ancient grains of barley but only down about half of its volume. The lower half of the pot is filled with gold coins, 240 gold pieces can be found if the pot is carefully searched. The last pot contains a trap. Within this pot is an alchemical substance which when exposed to oxygen abruptly will burst into fire, this fire will cause another substance in the jar to explode violently sending shards of fired clay and fragments of lead pellets contained in the jar throughout the chamber. The explosion of the pot has a 20% chance of causing debris from the ceiling to rain down. Even if this occurs the roof and walls of the barrow will remain solidly in place. The exploding pot trap will inflict 2d4 damage to anyone standing in area 2 or 3. A successful saving throw will half the damage taken.
4. This is the hiding place of the Wight. This chamber's floor is covered with scattered bones from men, a few dwarves and a variety of different animals which the Wight has managed to catch after dark straying to close to is tomb. If the player characters are foolish enough to enter the barrow after dark, the Wight will be able to pursuit them up to one hundred yards away from its barrow without suffering an penalties or negative effects. If the Wight manages to slay or drain a party member it will drag the corpse back to this location where it will consume it. Characters drained of all levels by this form of wight will raise up as Shadows under the control of the Wight within five days of their death. The Shadows within the barrow are not able to exit the barrow at any time being trapped within and forced to guard the treasures in area 9. No Shadows hide in area 4. There are two hiding in area 6 and three more hiding in area 9. When either of the groups of Shadows in the barrow are discovered and engaged in combat the other group will emerge and attack the party from behind. The Wight prefers to attack intruders into its barrow after the Shadows have been used to weaken them, it cares little whether or not the Shadows are destroyed, knowing it can always make more.
Frequency: Uncommon
No. Appearing: Usually 1, Sometimes 1d6+1
Armor Class: 5 (15)
Affected only by silver or magical weapons and spells.
Move: 12"
Hit Dice: 4+3 (28 Hp)
No. Attacks: 1
Damage Attack: 1d4 plus saving throw or lose 1 level and all associated hit points and abilities.
Intelligence: Average (Cunning)
Alignment: Chaotic Evil
Size: M
Psionics: Nil
Experience Value: 450 xp
5. There is a single sconce for holding a torch just to the left of where area 2 enters area 3. A torch placed into that sconce can just illuminate to this location within the barrow. Here there is a narrow, two foot wide opening to the West into area 6 which contains more clay urns and an impressive helmet for a great chieftain or warlord which has the skull of an elk fashioned in blue steel into the top of the helm and which has a rack of great spreading antlers protruding from their side. To the East a longer two foot wide tunnel curves to the South East before entering area 9. Past the juncture of the West and East openings there is a twenty foot deep by fifteen foot wide alcove at the end of the tunnel. The floor of this alcove is covered with a scattering of silver and gold coins, as if someone holding them had stumbled and spilled them across the floor of the barrow in this area. Note: In total there are 58 silver coins and 43 gold coins and it would take roughly a full turn or 10 minutes to search the floor of area 7 to find them all.
The air here is even cooler and the darkness seems even more intense and oppressive. Even wearing winter clothing and holding a torch it is impossible to feel warm from this location forward into the barrow.
6. Two shadows conceal themselves within the oppressive darkness of this chamber. They will emerge and attack anyone who enters the chamber or who lingers for any time in area 7.
Frequency: Uncommon
Armor Class: 7 (13)
Asmorgar Shadow Servants take 1/2 damage from normal weapons and require silver or magical weapons or spells to affect normally.
No. Appearing: 1d10
Move: 12"
Hit Dice: 3+3 (18 hp each)
No. of Attacks: 1
Damage: 1d4+1 and drains 1 Strength
Intelligence: Low (Animal)
Alignment: Chaotic Evil
Size: M
Psionics: Nil
Experience Value: 300 xp each
Targets completely drained of strength fall limp and unable to move onto the floor of the barrow. A target drained to a strength of 5 or lower can only move at 1/2 of their normal movement rate. Drained targets which are still alive and left immobile within the barrow by fleeing companions will be dragged by the Wight into location 4 where they will be eaten alive. Eaten characters rise as a Shadow under the control of the Wight within five days. A character slain by this type of Shadow is dead and does not returns as a Shadow but there is a 25% penalty on all attempts to resurrect such a character.
This area contains one small clay urn, two medium sized clay urns and one large clay urn, along with the antlered helm.
The antlered helm is a cursed object from the evil Kingdom of Asmorgar. While this impressive helm belonging to some ancient chieftain or captain of Asmorgar grants a magical +1 bonus to armor class and saving throws it causes any character wearing it to fall into a bloodthirsty rage any time they are dropped below half of their total hit points. The character in this state of rage gains no advantages but will continue combat offering no surrender and no quarter to any opponents who surrender or ask for mercy. When combat is over the character must make a saving throw or turn and attack the nearest ally. They may retry their saving throw at the end of each new combat round in order to shake off of the blood lust. The helmet will not remove once it is put on because of its cursed nature. The wide horns of the helm make it difficult to fight in close quarter locations more narrow than five feet wide. The helm has a value of 1,000 gold pieces despite its cursed nature and an experience value of 1,000 xp.
The small clay urn contains silver coins. It contains a total of 430 silver.
The large clay urn contains oil. If the trapped medium sized clay urn next to it is opened and explodes the explosion will also break open and set alight all of the oil in this large container. This combined effect will engulf the entire area 6 and area 7 in a fireball of exploding materials.
The medium urn next to the large urn is trapped. It contains a similar substance to the trapped clay pot in area 3. If exposed to the air of the barrow the contents will explode inflicting 2d4 damage to anyone who fails a saving throw in area 6. If the large container of oil is still next to this pot when it explodes change the effect to a 4d4 explosion of burning oil and flying shards of clay pot, coins and other debris which fills the entirety of area 6 and 7. Note that the Shadows in area 6, if they are still alive must make their own saving throws in order to take half damage from this large explosion.
Characters who failed their saving throw will have their hearing impaired because of the confined explosion for 3d6 combat rounds or from 3 to 18 minutes. During this time they can hear nothing but a loud and high pitched ringing noise in their ears.
Despite the large fireball explosion the stone structure of the roof and walls of the barrow remain solid and intact.
The last medium urn in this area contains more silver coins. The pot contains 1,200 silver pieces. All of the silver coins in this chamber turn into projectiles and are hurled throughout area 6 and 7 if the combined exploding pot and large pot of oil trap is triggered.
7. This is a space similar to an alcove at the end of the main tunnel. The floor here is covered with scattered silver and gold coins. There are 58 silver and 43 gold coins here. It will take an entire turn or 10 minutes to gather them all. If characters loiter in area 7 searching for and picking up coins the Shadows in area 6 will emerge and attack first. Once the party is engaged in combat, the third combat round after combat begins the three Shadows in area 9 will emerge and attempt to attack the party from the rear.
8. This narrow tunnel leads to the large and main chamber of the barrow further in at location 9. It curves slightly to the South as it continues. Any characters standing here during the explosion from area 6 will be safe from any flame or flying debris, although they will be immediately attacked by the three Shadows hiding in area 9 the moment after the explosion occurs.
9. This is a large over sized sarcophagus carved from black stone. Handles of gold have been fixed to the ends and the sides. Each handle is worth 20 gold pieces and there are six in total. The sarcophagus was carved so that four braziers for lit coals rise up from the corners. The sides of the sarcophagus are carved with grim faced mounted warriors in battle. The top of the sarcophagus is carved with a skeletal figure of a warrior in mail armor and a helm with elk horns. Leaning against the wall next to the sarcophagus is a round shield and a doubled edged battle axe. Both appear to be in fine condition although coated in grime and dust. A tattered banner hangs from a flag pole secured into the stone in one corner. The banner is in tatters. It depicts a stag horned helm in black on a field of faded crimson.
The axe is a +1 Battle Axe of Slaughter. Any time this axe slays a living humanoid foe it feeds on the dying life force and shares one hit point of healing to whoever is wielding it. It has a value of 1,000 gold pieces and is worth 750 xp.
The shield is a +1 Shield. It is worth 2,500 gold pieces and has an experience value of 250 xp.
The sarcophagus is empty of any body, the lid can be removed merely by lifting it off. It contains a gold arm ring typical of a Northern warrior of high ranking. It is fashioned in the likeness of a snake and has gem decorations. The arm ring has a value of 400 gold pieces. Also within the sarcophagus is 230 gold pieces in loose coins.
Great map and adventure! I linked people over here from my blog this week. I am enjoying your blog very much!
ReplyDeleteOh my gosh! Thank you SO much. Sometimes I feel like I am on the radio talking to nobody so having a little feedback really helps.
Delete